For More Info or to Buy Now: www.hsn.com Magnavox DVD/VHS Combo Recorder BundleGet the best of both worlds with this dual DVD/VHS combo recorder and player from Magnavox. Enjoy the flexibility of being able to record to and playback... Prices shown on the previously recorded video may not represent the current price. View hsn.com to view the current selling price. HSN Item #968871
Wednesday, December 28, 2011
Sunday, December 25, 2011
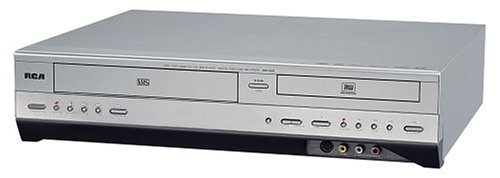
DVD/VHS COMBO W/COXIAL/SVID COMPOSITE/RCA AUDIO/REMOTE/NO TUNER

!±8±DVD/VHS COMBO W/COXIAL/SVID COMPOSITE/RCA AUDIO/REMOTE/NO TUNER
Brand : ToshibaRate :

Price : $95.80
Post Date : Dec 25, 2011 10:25:34
Usually ships in 1-2 business days
VHS, DVD-R/RW, CD-RW - DVD Video Playback, Video CD Playback, WMA Playback, MP3 Playback, JPEG Playback, DivX Playback, SQPB Playback - 1 Disc(s) - Progressive Scan - Black. Fitting more entertainment value into less shelf space just got easier. With a DVD/VCR combo player, you get the connectivity and features without the clutter. One Touch Recording for the VCR provides a simple and convenient way to make a recording. Simply connect your DVD/VCR to your cable or satellite box and then to your monitor/TV and you are set to record a tape with the push of one button!
Sunday, December 18, 2011
Sony RDR-VX535 DVD Recorder & VCR Combo Player with 1080p HDMI Upscaling and Bonus HDMI Cable
!±8± Sony RDR-VX535 DVD Recorder & VCR Combo Player with 1080p HDMI Upscaling and Bonus HDMI Cable

It's time to realize that discs have already replaced tapes. Sony RDR-VX535 DVD VCR Combo lets you play VHS tapes and also record them onto DVD discs. That way you can save all your old personal tapes on DVD for upcoming generations. This deck connects to your HDTV with an HDMI connector. This means you can experience 1080p upconversion for superior images from DVD.
Programming your recordings is easy with easy to follow menus HDMI Output Coaxial Audio Digital Output 2 RCA Audio Inputs 2 RCA Audio Outputs 2 S-Video Inputs 1 S-Video Output 2 Composite Video Inputs 1 Composite Video Output 1 Component Video (Y/Pb/Pr) Output for progressive play from DVD 1 RF Connection Output 1 Optical Audio Output i.LINK for DV/Digital8 Video Input Video Head Stereo VHS with 19 Micron Heads. Easy to use graphic user interface. Parental Control. Child Lock for locking the disc tray. DVD+RW/+R, DVD-RW (Video Mode, V-R Mode)/-R, DVD+R DL recording and playback. DVD-Video/Video CD/SVCD/CD-DA (CD-R/-RW) playback. MP3 on CD-R/-RW playback Includes Remote Control
- HDMI connectivity delivers 1080p/1080i/720p upscaling for DVD and VHS video1 and simplifies cable connections.
- Two-way One-touch Dubbing records from VHS to DVD or reverse.
- Digital music and digital image playback capability lets you listen to MP3 encoded audio files or view JPEG images encoded on CD or DVD media.
- DVD+RW/+R/-RW/-R(Video) Recording & Playback, including DVD-RAM playback.
- Auto Clock Set & Tuning System through Line1 Input. Fast Playback with Sound on DVD.
Discount Microdermabrasion At Home Kits Universal Roof Rack Cross Bars Save You Money!
Tuesday, December 13, 2011
Panasonic DMR-EZ47V Up-Converting 1080p DVD-Recorder/VCR Combo with Built In Tuner
!±8± Panasonic DMR-EZ47V Up-Converting 1080p DVD-Recorder/VCR Combo with Built In Tuner

Rate :
| Price : | Post Date : Dec 13, 2011 12:30:50N/A
DVD/VCR/SD Card Recorder, With ATSC Digital Tuner,1080P HDMI Upconversaion DV Input
Cheep Gluten Free Sprouted Bread Eternity Perfume For Women Grand Sale
Thursday, December 8, 2011
Laser Disc - The Evolution of Karaoke, Part 1
I have been selling Karaoke products for nearly 25 years, which tells you at least two things; one, that I'm not a spring chicken (if you do the math, I have to be at least 45 years old because who starts selling Karaoke when they're 13?) and two, I've seen a lot of changes in the karaoke market, especially when it comes to the machines that are available.
When I first started selling karaoke in the 1980's there were basically four major companies involved with the production of American karaoke machines and software. They were Pioneer, Sony, BMB/Nikkodo, and Megastar. Soon to follow were most of the major electronics companies, companies like Panasonic, JVC, RCA, Yamaha, Sanyo, among others. But the biggie of all these companies, as far as karaoke was involved, was Pioneer. Pioneer initially started with their Laser Disc line, offering both the hardware and a very successful software line. Pioneer released less than 100 Professional 28 Song English Karaoke Laser Discs between 1986 to 1994, and each Laser Disc sold for upwards of 0. Although 100 discs did not seem like a lot, on top of these Laser Karaoke Discs, there were thousands of movies, concerts, vintage TV shows, and other video programs being produced by Pioneer. Then other companies began their production of Laser Discs, not only in the karaoke field, but in all aspects of the video industry. The quality of the Laser Disc was far superior to the then prevalent VHS and Betamax formats, it even initially proved better than DVD, both in audio and in video quality. Oh, the future of Laser Disc looked bright. Here was a format that could bring the old movies and t.v. programs back to life, to a realism never before possible. However, in time, trouble started to develop for Pioneer and eventually the entire Laser Disc industry.
First of all, the Laser Disc proved too costly for the American Consumer. On a karaoke disc, 28 songs was about the most that could be programmed onto the disc, 14 per side. At 0 per disc, the cost per song was over each track. If that was the only karaoke available, which it was for a short while, then people would pay that because there was no other option. However CD+G karaoke soon was introduced and 18 tracks sold for around , the cost per song being less than half of what it was on Laser Disc. Pioneer, and other developers of Laser Disc Karaoke, were probably banking on the fact that the quality of the music was superior on the Laser Disc and also that CD+G Karaoke did not display any moving video, just the lyrics of the songs for the most part.
That brings us to our second problem with Laser Disc Karaoke. Karaoke started in Japan and soon was very popular in the entire Far East. Almost all the karaoke software available in these places - China, Japan, the Philippines, Thailand, etc. would display a moving video along with the lyrics to the songs. CD+G karaoke has never been popular in these places, since there was no accompanying video to the lyrics of the songs. However the American Public did not take to the video portion of the karaoke tracks. Although Pioneer did a pretty decent job at shooting videos with good looking actors, some sort of storyline, or exotic scenes, most people in the U.S.A. considered the video portion of the karaoke song to be a distraction. That meant that Pioneer was spending more money on developing karaoke tracks for a feature that most would rather choose not to see. Other companies also added to the disdain of Laser Karaoke by producing cheap videos with poor lighting, ugly actors, and videos that had no apparent connecting storyline to the theme of the song. So, basically the feature that was supposed to make Laser Disc Karaoke stand apart from CD+G Karaoke and be it's big selling point, the moving video, in the end proved to be a contributing factor to it's demise.
Another contributing factor to the extinction of Laser Karaoke was the size of the discs. Each professional 28 Song Laser Disc was 12 inches round, the same size as a 33 RPM record. However it was heavier than a record. When professionals in the business had to haul around 100 or more of these discs, the temptation to switch to a lighter, easier, more accessible format, the CD+G, proved too great. Pioneer tried to combat this problem by offering a smaller, lighter 8" Laser Disc. This solution only created another problem. The smaller Laser Disc only had about 8 songs, that's all that could be programmed onto them. That meant that to have the same amount of songs to offer, a KJ would not have to haul around 500 or more of these discs.
Although a Laser Disc was quite large in size, the amount of information that could be stored on it was quite limited, about 60 minutes per side. With karaoke songs, this did not initially prove to be a problem, as songs are only 3 to 5 minutes long. However when watching movies, this became a problem. Right in the middle of the movie, possibly in the middle of a dramatic scene, the Laser Disc would need to be flipped over. Laser Disc machines would later be developed that flipped the disc automatically at the end of playback of side A over to side B. This still proved to be a problem when viewing movies or programs that had a running time of over 2 hours, since the rest of the program would have to be stored on a second disc, requiring the manual removal of the first disc and insertion of the second disc. In an American society that doesn't want to get up from the couch once the movie starts, this limitation proved to be too great. Since Laser Disc did not catch on and the American consumer, for the most part, did not switch their VCRs to Laser Disc players, Pioneer could not support the format for just Karaoke enthusiasts. They pulled the plug on their Laser Karaoke line in the mid-1990's, converting many of their Karaoke Music tracks over to the CD+G or DVD format. The 'writing was on the wall' when Pioneer, the great Proponent of Laser Karaoke, introduced a CD+G Karaoke machine without Laser Disc capability. Laser Disc Karaoke was definitely on it's way out.
Many of you who have been singing for some time may have gone the route of Laser Karaoke and some of you may still have a Laser Karaoke player that you pull out for family get-togethers or every once in a blue moon. Well I've got good news and bad news for those of you that are still clinging on to these old karaoke dinosaurs. The bad news is that if you want to sing any music from this century you will need to buy your karaoke on the cd+g format. Some of you may have a combo Laser Disc/CD+G player, so that will not be a problem. If you do not have one of these, there are many inexpensive karaoke players available. Which brings me to the good news. Karaoke hardware and software is getting more and more affordable. On the software side - some companies that still have an old stock of Laser Discs will offer these at a substantial discount. I know of one company that offers brand new Karaoke Laser Discs for as low as .00 each. Karaoke CD+G's are often priced in the .00 range. New digital formats offer songs for a cost as low as 10 cents a song, a far cry from the .00 a song that was once the norm for Laser Disc Karaoke. As far as hardware goes - machines are priced well below 0.00, many of them with features that include MP3+G playback and even some that have MP3+G recording. The evolution of karaoke may have seen the extinction of the Laser Karaoke format but what now has replaced it more than compensates for the loss. Karaoke machines and discs are now more affordable than ever and available to anyone who wants to sing.
Rest in peace, Laser Disc Karaoke. You started us off on the course of bringing quality karaoke tracks right into the comfort of our own homes, but, alas, your time here on earth was short. Now you can only be found in attics, garage sales, and second hand stores, next to Pet Rocks and 8-Track Machines. We will miss you and forever be grateful for your contribution to the karaoke world.
Thursday, December 1, 2011
TVs & DVD Players : How to Record From DVR to DVD
The easiest way to record from DVR to DVD is to buy a DVR or TiVo with a DVD burner built into the device. Record from DVR to DVD by using a DVD burner with tips from a digital technology specialist in this free video on DVRs. Expert: Christopher Rokosz Bio: Christopher Rokosz, 'The Digital Lifestyle Expert,' is just that. He is an expert on new media, the latest technology, and how to integrate it into daily life. Filmmaker: Christopher Rokosz
Price Ikea Farmhouse Sink Everquest Ii Velious Sale Uniden Bearcat Grand Sale
Sunday, November 27, 2011
Making Audio CD's From Your Cassettes
From the 1970's through the '90's compact cassettes were the most popular form of audio available. Also known as audio cassettes, cassette tapes, or just plain tapes. While eventually becoming a popular choice for all audio media, the cassette was originally made for taking dictation, but the improvement in audio quality and portability made the cassette a favorite with everyone, young and old.
Once CD's were introduced, the quality was found to be far superior to cassettes, and there are many reasons to transfer your collection of 1980's music cassettes onto CD's. Many of the albums that you may have on cassette are out of print, hard to find or simply impossible to recreate concert bootleg recordings you made in your teen years. Another reason is that archiving will preserve the quality and keep your music library full of the old tunes. Not that we said preserve the quality of your cassettes. Transferring your tapes onto a CD won't improve the audio quality, a CD is only as good as the source. Tapes become worn out, stretched and can have many audio problems that will carry over onto a CD.
Luckily bringing your old cassettes into a digital format is a simple process, and even easier than transferring a VHS tape to a DVD. If you own a computer and of course your cassettes and tape player you more than likely have all the equipment you need. Equipment to transfer cassette to DVD
A. A 3.5mm stereo audio cable to connect the player to the sound card in your computer. (Many people won't have this item, but it is relatively inexpensive and easy to find.)
B. A cassette player to play the cassette tapes.
C. The Audacity program. Audacity is an open source program to allow you to record and edit audio. You may also need to install the LAME MP3 encoder if you plan to store your music as MP3 files for use on the computer or MP3 player.
What Now?
Download and install Audacity. Audacity is free and can be used on most any platform including Windows, Max and Linux, making the steps in this article nearly universal. While your operating system may have its own recording software Audacity offers many more recording and editing options.
Once Audacity is installed, you will have to make some small adjustments in the program for what you want to do. Go to the Edit menu, and select the option Preferences, then set the channel number to 2. Even if your cassette was made on one channel (mono) your new CD will be listened to in stereo and you will need to record sound to both channels. If you don't change this setting the sound through a headphone will only be heard in one ear.
The next setting is the bit rate for recording. The choice of bit rate depends on what is being recorded as well as the sound quality of the cassette. Essentially a bit rate is what determines how much data will be used to "describe" the information in your audio recording. The human voice, such as on a book on tape covers a narrow audible frequency range, and the setting of 24 kbs (kilobits per second) is what should be used to reproduce the sound quality. Lower than 24 kbs, may cause a "thinny" recording.
For music a higher bit rate is needed. Just as the range of an instrument is far more varied than human speech a higher bit rate is needed to faithfully reproduce the quality of much more information. The basic fidelity available on an audio tape should record just fine at 128 kbs.
A 256 kbs bit rate is nearly CD quality. While you may think that would be the best choice, it will not improve your quality and will give you a larger file for no reason.
If the cassette recording is exceedingly poor quality, recording at a lower bit rate may help by removing some of the information instead of recording that data. This can help remove both background noise and static, and make it easier for you to edit and clean up the audio.
Recording
Attach the cassette player to the sound card using a patch cord. Most computers have a sound card built in. Simply plug the cable into the "MIC" input, if it is not marked look for a color coded red or pink input. If using a stereo for playback you more than likely have RCA audio plugs and will need a Y cable to go from the RCA ports to the stereo inputs for the sound card. If you are using a basic Walkman or other simple tape player and plan to use the earphone jack you will need a stereo to stereo patch cable.
Many computers have a direct input labeled microphone as well. You can use this input if necessary, but more favorable result will occur if you use the "line in" input. Results vary and the best option for you will only be found after you experiment with different methods.
Once you have everything connected, you get to make a few mistakes and start over a few times, because the next step requires a bit of trial and error. You must start Audacity and make test recordings to adjust the volume levels of your tape player and computer. If the volume is too loud your sound card will "clip" the top level of the sound wave and won't reproduce the audio in whole. Once the volume levels are adjusted you are ready to copy a tape to your computer.
Copying to Computer File
You're connected, and set up, now you can begin your first transfer. Start recording on Audacity and press Play on the tape player. Your computer will record the audio that is coming in through the sound card. Once the tape finished, stop the program from recording and save the audio file to your computer.
Do a sound check by scanning and listening to different parts of the file to make sure it sounds good. Audacity and other sound applications allows you to remove the silence from the beginning and end of the recording. You can also use different features to remove noise, static, tape hiss and other audio blips.
TIP: You should always keep an untouched original of the audio file and save changes to a new file. Because once you make changes it can be difficult and often impossible to undo the changes. By keeping an original you can start over any time.
Burn Your File To a CD
Once you have the audio edited to your liking you can burn the file onto a CD. You don't need any special software to burn a CD. Windows media player and iTunes as well as many other basic players allow you to burn an audio CD from files on the computer. If these two programs aren't on your computer, basically any free player will allow you to burn an audio CD.
Enjoy Your Cassettes on CD
While burning cassettes to CD's requires a learning curve and some trial and error it is not difficult and is usually pain free after the fist attempt. Now that you have saved all that great music from your youth enjoy your new CD's and know that your collection is safe and sound both in a digital file and on CD.
Promotional Exercise Bikes For Seniors Promotions Baby Food Purees Oster Toaster Red Discount
Friday, November 25, 2011
Phone, Internet, TV, Wireless...Comparing Bundled Services
This article will allow consumers to educate themselves on the best deals possible for bundled services. In the ever changing and ultra competitive world of telecom many consumers can be confused with the many different bundled plans and services most phone companies now offer. With the implementation of bundled services consumers can now have most all telecom products (phone, tv, internet, wireless) and services provided by the same company at a lower rate than having multiple service providers. This article will categorically break down plans provided by most major telecom service providers available in th US. Each provider will be rated based on blanket availability, services offered, and cost effectiveness. These are comprehensive reviews based on research and not personal experience. Phone Companies Beware this article is designed to educate consumers and provide the best possible options for telecom services.
First up AT&T The monopolizing entity of the Big 3 phone companies few can compete with the blanket availability of AT&T's products and services worldwide. Being one of only three telecom companies that also offer wireless phone service as a part of its residential bundle which also includes its unlimited calling plan phone service, satellite TV Through Dish Network and of course the world famous ATT Yahoo DSL. Few companies can compete, but there are cheaper bundled service plans out there especially for the consumer that is not interested in cellular phone service. Here is an example of the services offered and billing for the AT&T Residential bundled services plan.
Phone Service- Order AT&T All Distance Online Select(SM) online and get unlimited local and domestic direct-dialed long distance plus great calling features.
TV Service- AT&T | DISH Network entertainment package with over 60 of America's favorite channels. Includes local channels Plus Free DVR.
High Speed Internet- Yahoo DSL ATT,Plus, order Express online and receive 1 month FREE! (New residential DSL customers only. Bill credit applied after three months paid service. See offer details.)
Wireless Cell Phone- Cingular Nation 450 anytime minutes Cingular Wireless® plan with Rollover® Minutes, unlimited Mobile to Mobile minutes, and more. Plus get a /mo. discount
with qualifying AT&T services.
Bundled Plan Total Cost 0.94/mo or less!
Well Old Ma Bell Does Have A Cost Effective Money Saving Bundle With The Most Availability!
4.5/5 Stars
Next we have Qwest Communications One of the Big 3 Telecom service providers its coverage area is limited to the Western half of the states mainly the Pacific Northwest but as far as price and overall services this company by far has the best bundled package including wireless cell phone service on the market. One Negative though No free DVR here but more channels with Direct TV as opposed to ATT Dish Network, Here are the details.
Phone Service- Digital Voice: Unlimited local and long-distance calls from your home phone to anywhere in the U.S. and now Canada, anytime. PLUS, choose up to three of your favorite calling features.
TV Service- The DIRECTV® package offers 185+ channels in 100% digital quality.
High Speed Internet- Qwest Choice DSL Deluxe with MSN. Unlimited Internet access that's up to 25 times faster than 56Kbps dial-up.
Wireless Cell Phone- 500-minute plan, free UT Starcom 7025 phone (after credit on 2nd or 3rd bill, with a two-year agreement), free headset and charger, free shipping, free activation and free Unlimited Nights and Weekends Starting at 9 p.m. WHOO HOOO a FREE PHONE!
Bundled Plan Total Cost 125.96/mo
Unbeatable 5/5 stars if its available in your are choose Qwest!
Well here it is last of the Big 3 Phone companies Verizon. I'm wondering which of these companies will be around for the next 20 years with AT&T having a strangle hold on our national market. Verizon Phone company does provide some pretty stiff competition for Old Ma Bell though, Here are the details.
Phone- Verizon's Freedom Essentials provides unlimited calls to the US and Canada as well as the main basic calling features with voicemail being FREE 1 up on AT&T.
TV Service- Same Plan as Qwest with Direct TV more channels for the money as opposed to AT&T.
High Speed Internet- DSL the cable companies sure have 1 up on DSL consumers with faster speed available but in a bundle Verizon has a pretty good plan, Connection speeds up to 3.0 Mbps, More than 80 times faster than dial-up, Three installation steps
here is the one negative with their DSL service in the bundle One-year commitment required.
Wireless- Well We've all heard of the network on TV and the such and Verizon Phone Company does offer wireless services as part of its bundle with 450 anytime minutes and a standard wireless plan.
Bundled Plan Total Cost 134.99-144.99/mo depending on your area.
I would have to rate them #2 amongst the Big 3 as far as services and pricing but they do have the edge on Qwest based up blanket availability.
4.5/5.0 stars
Now we go on to the cable companies that have also submitted their bids for your telephone service as well first up we have Comcast Cable Company. Well if you are truly dedicated to cable TV and internet if available in your area Comcast Cable Company is the way to go all necessary equipment is Free after mail in rebates and services are exceptional based on consumer reviews online. Here are the details.
Phone- Unlimited local and long distance in the US (excluding Alaska and Hawaii) and Canada from one provider. One bill for local and long distance. Keep your current phone number (subject to some restrictions).
TV Service- Over a hundred channels, plus local channels. Digital quality picture and sound. Parental Controls and an Interactive Program Guide Movies and shows you can start on your schedule with Comcast OnDemand - many included at no cost.
High Speed Internet- Comcast Highspeed Cable Internet, Speeds up to 3Mbps and a reliable connection. Anti-virus and firewall software, spam filtering and parental controls included. Always connected, no dial-up required. Up to 10 email boxes and extra storage FREE MODEM NO LEASING FEE AFTER REBATE!
With no wireless service available as part of the bundle I still have to give the Cable edge to Comcast with So many cash back offers on signup!
Bundled Plan Total Cost 99.00/mo
Next Up Charter Communications, the reviews are in some good some bad and well some just plain indifferent. Charter Communication Cable...Cable TV's answer to the Big 3 phone companies (AT&T, Qwest, Verizon) and satellite tv's quest to crush cable have assembled their own bundled telecom services package as well. Though wireless cell phone services are not offered as part of the Charter Bundle. Charter does have a few advantages that may just sway a chunk of loyal wireless consumers back to the wired world. Here are the details.
Phone- Unlimited local and long distance in the US (excluding Alaska and Hawaii) and Canada from one provider. One bill for local and long distance. Keep your current phone number (subject to some restrictions).
TV Service- Over a hundred channels, plus local channels. Digital quality picture and sound. Parental Controls and an Interactive Program Guide Movies and shows you can start on your schedule with Charter OnDemand - many included at no cost.
High Speed Internet- Charter Highspeed Cable Internet, Speeds up to 3Mbps and a reliable connection. Anti-virus and firewall software, spam filtering and parental controls included. Always connected, no dial-up required. Up to 10 email boxes and extra storage
Wireless Cell Phone- NA
Bundled Plan Total Cost 99.97/mo
On Demand is Pretty Nice and no matter what DSL users say cable is faster than DSL but with no wireless service it means I still have to look at another bill month to month. Limited availability Though. 4.0/5 stars
Last but not least Time Warner Cable Company Well While Competing in huge markets such as New York, Houston, Dallas, and San Antonio Time Warner has a bundled services package that seems to be the best for the loyal cable consumer. Still no wireless phone service but with high speed cable internet service through Road Runner and On Demand programming as well as a free DVR included in its digital Cable package it seems to be the service to outlast Charter and Comcast in the Cable Providers rank and file in our new telecom bundled services world.
Phone- It's time for a better residential telephone service. It's time for unlimited calling to anywhere in the US, Canada and Puerto Rico, plus popular calling features for one low "monthly" price.
TV Service- Time Warner Cable Over 250 Channels
With features like Digital Video Recorder (DVR), you can now record anything you like and watch it later, with all the control of a VCR or a DVD. You can even pause live TV. Plus On Demand
High Speed Internet- high speed cable via Road Runner. Hey Its Cable internet always on and faster than DSL.
Wireless Cell Phone- NA
Bundled Plan Total Cost 99.97/mo
Hey I had AT&T but DSL was too unreliable I now have Charter but wish I could have Time Warner
4.0/5 stars
In closing with the market as competitive as it has become for your telecom dollars finding the best bundled services package for your home or business is just a matter of educating yourself.
Tuesday, November 22, 2011
RCA DRC8300N DVD Player/Recorder and VCR Combo
!±8±RCA DRC8300N DVD Player/Recorder and VCR Combo
Brand : RCARate :
Price :
Post Date : Nov 22, 2011 11:17:47
N/A
Incorporating DVD recording, progressive-scan DVD playback, and a 4-head hi-fi VCR, RCA's DRC8300N offers numerous features to enhance your viewing and recording. The player/recorder gives you a choice of recording your favorite television shows and home videos straight to DVD or to VHS tape. It stores digital video in high-quality MPEG2 and encodes audio in space-saving MP3. For playback, Scene Again instant replay accesses previously viewed DVD or tape segments in 10-second increments, and a 30-second "advance" function lets you skip ahead to preferred scenes on either DVDs or tape.
With just a couple button presses, you can transfer your home videos from a VHS tape directly to a DVD with no cables to connect, no levels to set. More sophisticated editing is also a snap with programmable tape playback, letting you select only those scenes you want to copy before recording to disc. You can even split titles or hide unwanted chapters after recording the content to a DVD+RW disc.
The RW format offers numerous advantages. These discs can be played in most computer DVD-ROM drives and DVD players, and you let you append, edit, and overwrite video right on the discs themselves. This means you can record video using the DRC8300N and record data with a PC drive, all on the same disc. There's only one recording mode for both video and data, and the finalization time for a DVD+R is the fastest of all DVD formats.
Special features include DVD title and chapter creation for easy access to recorded materials; chapter hide/unhide, which lets you skip playback of selected sections of a recording; text title labeling; user-selectable disc write and title-write protection, and quick disc erase. Recorded discs will playback on most DVD players, and the unit itself plays all DVD and audio CDs.
More than just a recording device, however, the DRC8300N is also a first-rate media player, offering MP3 music file decoding and Digital PhotoView, which displays JPEG files (from recordable CDs only) in a rotating slide show format--with MP3 playback during the slide show.
And, whether your living room is currently home to an HDTV or you're merely thinking of "someday," the DRC8300N is ready to deliver the full potential of prerecorded DVDs. Progressive scanning, called 480p for the number of horizontal lines that compose the video image, creates a picture using twice the scan lines of a conventional DVD picture, giving you higher resolution and sharper images while eliminating nearly all motion artifacts.
An onscreen DVD library stores up to 400 titles so you can easily sort and locate any title you've recorded using the DRC8300N. You can even find the discs with the most available blank space for new recordings. The onscreen keyboard makes it easy to create and edit program names for all your personal recordings. Choose from six recording modes, from 1 to 8 hours, while SmartRecord automatically adjusts the quality of the recording to fit the available remaining space.
Other features include S-video inputs for simple recording and playback from camcorders, a time-base corrector, and digital noise reduction circuitry, which eliminates picture jitter and even reduces noise from videotape playback to significantly improve the quality of recordings from videocassette recorders or camcorders.
Easily integrated into an existing home theater, the DRC8300N includes a Dolby Digital and DTS-compatible optical digital-audio output, 2 composite-video inputs, 1 composite video output, analog audio inputs and outputs, an RF coaxial input/output, and a component-video output.
202 Schwinn Recumbent Exercise Bike Immediately Order Mud Pie Baby Clothing
Thursday, November 3, 2011
Subscribe to:
Posts (Atom)
|
|
|
|
|
 |
 |
 |
 |
 |
 |
 |
 |